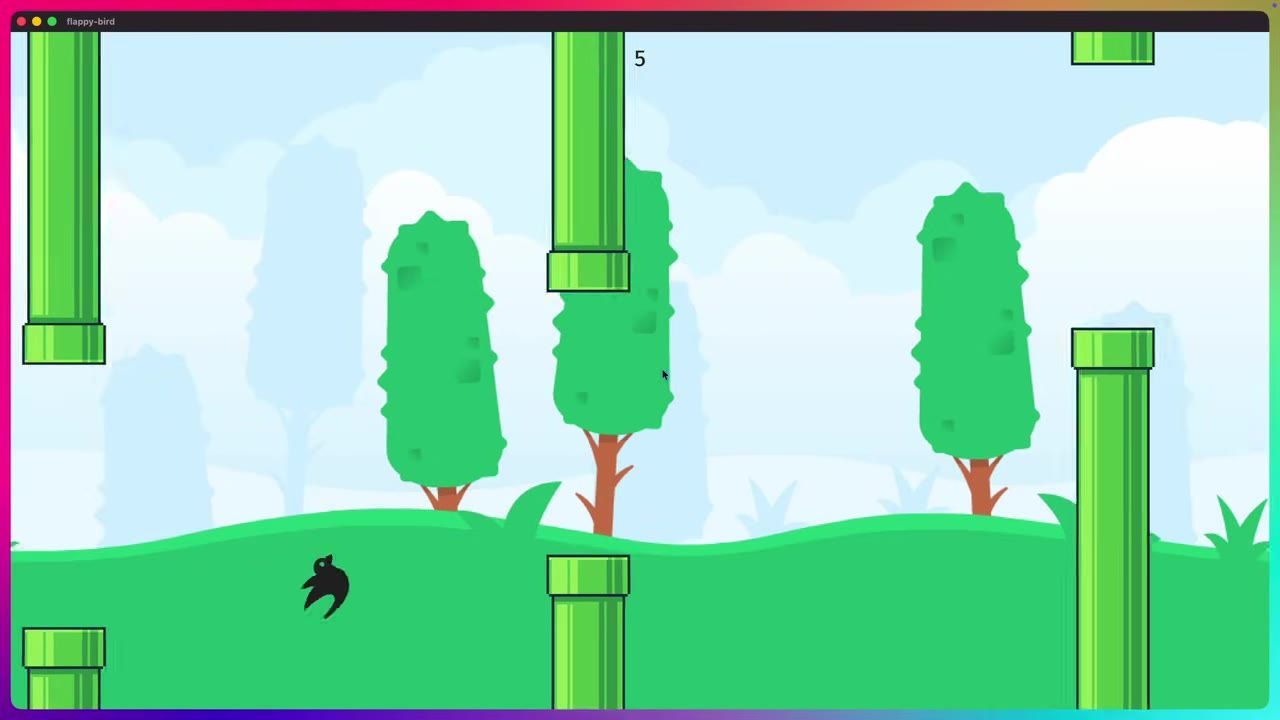
Start by scaffolding a new Bevy project, add a camera and player sprite, then implement gravity, jumping, bounds checks, pipes as a plugin, collision and scoring, and finish with background and polish. Bevy’s ECS structure organizes entities with components and systems for clear separation of game logic.
Start the Bevy project and run it
prerequisites
- Have Rust and Cargo installed.
- Install Bevy CLI (optional but recommended for scaffolding and running Bevy projects, especially for web deployments).
- Clone the prepared starter repository or scaffold a new project with the Bevy CLI.
- Add Bevy as a dependency if using Cargo directly.

A command line for creating a Bevy starter project is shown on a dark background. — chris biscardi
To begin, scaffold a new project using either the Bevy CLI or Cargo. The Bevy CLI streamlines project setup and eases web deployment. If you use Cargo, remember to add Bevy as a dependency. Once your project is created, run it using bevy run (if using Bevy CLI) or cargo run. The starter project includes initial assets and Bevy 0.18 as the dependency. Confirm the app runs before adding any gameplay features.
Spawn the first camera and sprite
steps
- In your main file, add a startup system to spawn a camera entity. Cameras define what’s rendered and must be present.
- Use
commands.spawnto create a camera entity and another entity with a sprite and transform components. This sprite is your initial placeholder player. - Position the sprite using the transform’s x, y, and z values. Z controls render layer order, with higher z stacking above lower.
Example:
use bevy::prelude::*;

fn setup(mut commands: Commands) {
    // Spawn camera
    commands.spawn(Camera2dBundle::default());
    // Spawn player placeholder sprite
    commands.spawn(SpriteBundle {
        sprite: Sprite {
            color: Color::WHITE,
            ..Default::default()
        },
        transform: Transform::from_xyz(0.0, 0.0, 1.0),
        ..Default::default()
    });
}

fn main() {
    App::new()
        .add_plugins(DefaultPlugins)
        .add_systems(Startup, setup)
        .run();
}
Set the canvas size and keep the view stable

A code editor shows OrthographicProjection settings with AutoMax scaling and a 480 by 270 canvas size. — chris biscardi
Add the player bird and make it fall and jump
steps
- Load the bird image via the asset server and assign it to the sprite for your player entity.
- Create three components: Player, Gravity, and Velocity. Assign them to the player entity so it always has all needed data.
- Implement a system for gravity: subtract gravity from velocity every fixed update tick, then move the player by its velocity.
- Add an input system: on mouse button press, set player velocity to an upward value for jumping. Use the update schedule for input.
Example component definitions:
use bevy::prelude::*;

#[derive(Component)]
struct Player;

#[derive(Component)]
struct Gravity(f32);

#[derive(Component, Default)]
struct Velocity(f32);

fn spawn_bird(mut commands: Commands, asset_server: Res<AssetServer>) {
    let bird_texture = asset_server.load("bevy_bird.png");

    commands.spawn((
        SpriteBundle {
            texture: bird_texture,
            ..Default::default()
        },
        Player,
        Gravity(1000.0),
        Velocity::default(),
    ));
}

// Gravity and movement system for fixed update
fn gravity_system(
    mut query: Query<(&mut Velocity, &Gravity, &mut Transform), With<Player>>,
    time: Res<Time>,
) {
    for (mut velocity, gravity, mut transform) in &mut query {
        velocity.0 -= gravity.0 * time.delta_seconds();
        transform.translation.y += velocity.0 * time.delta_seconds();
    }
}

// Input controls for jump
fn controls_system(
    mut query: Query<&mut Velocity, With<Player>>,
    mouse: Res<ButtonInput<MouseButton>>,
) {
    if mouse.just_pressed(MouseButton::Left) || mouse.just_pressed(MouseButton::Right) {
        if let Ok(mut velocity) = query.get_single_mut() {
            velocity.0 = 400.0;
        }
    }
}
A dark game window shows a small white bird sprite near the center with text at the bottom left. — chris biscardi
Handle bounds and respawn on game over

A console prints repeated INFO check_in_bounds messages beside a blank flappy-bird game window. — chris biscardi
Build the pipe plugin and move pipes on a timer
file tree
**Minimal folder structure for pipes plugin:**

```
flappy_bird/
├── src/
│   ├── main.rs
│   └── lib.rs
├── assets/
│   ├── bevy_bird.png
│   ├── pipe.png
│   └── background.png
└── Cargo.toml
```
- Shared constants (canvas size, pipe size) are moved to `lib.rs`.
- Define a **PipePlugin** and add it from `main.rs`.
- Use a timer condition in the plugin to spawn pipes repeatedly, moving them left in fixed update.
Code in src/main.rs adds DefaultPlugins and PipePlugin to the app. — chris biscardi
Example plugin structure:
// lib.rs
use bevy::prelude::*;

pub const PIPE_SPEED: f32 = 120.0;

pub struct PipePlugin;

impl Plugin for PipePlugin {
    fn build(&self, app: &mut App) {
        app.add_systems(FixedUpdate, (spawn_pipes, shift_pipes_left));
    }
}
Make pipes into a hierarchy and despawn them
steps
- Spawn a root pipe entity with child sprites for pipe top, gap (points gate), and pipe bottom.
- Move the pipes leftwards by updating just the root’s transform.
- Despawn the root pipe entity (and all its children) when it leaves the play area using the
despawn_recursivemethod.
Example hierarchy:
fn spawn_pipes(mut commands: Commands, asset_server: Res<AssetServer>) {
    let pipe_texture = asset_server.load("pipe.png");

    commands.spawn((
        TransformBundle::default(),
        Pipe,
        VisibilityBundle::default(),
        ChildrenBundle(vec![
            // Top pipe sprite
            SpriteBundle {
                texture: pipe_texture.clone(),
                // additional transforms
                ..Default::default()
            },
            // Points gate/gap sprite
            SpriteBundle {
                texture: pipe_texture.clone(),
                // additional transforms
                ..Default::default()
            },
            // Bottom pipe sprite
            SpriteBundle {
                texture: pipe_texture.clone(),
                // additional transforms
                ..Default::default()
            },
        ]),
    ));
}

fn despawn_pipes(
    mut commands: Commands,
    query: Query<(Entity, &Transform), With<Pipe>>,
) {
    for (entity, transform) in query.iter() {
        if transform.translation.x < -240.0 {
            commands.entity(entity).despawn_recursive();
        }
    }
}
Add collisions, gizmos, and score
before after
Wrong: Score and collision logic run every frame and text updates constantly.
// Score update every frame (inefficient)
fn update_score_text(
    mut query: Query<&mut Text, With<ScoreText>>,
    score: Res<Score>,
) {
    for mut text in &mut query {
        text.value = format!("{}", score.0);
    }
}Correct: Score updates only when the resource changes, and collision triggers score events with observers.
// Score update system runs only if score changes
fn update_score_text(
    mut query: Query<&mut Text, With<ScoreText>>,
    score: Res<Score>,
) {
    if score.is_changed() {
        for mut text in &mut query {
            text.value = format!("{}", score.0);
        }
    }
}

// Collision with gap triggers event, observer updates score
fn collision_system(
    mut commands: Commands,
    query: Query<&Transform, With<Player>>,
    gap_query: Query<(Entity, &Transform), With<PointsGate>>,
) {
    for player_transform in &query {
        for (gap_entity, gap_transform) in &gap_query {
            if is_collision(player_transform, gap_transform) {
                commands.entity(gap_entity).despawn();
                commands.trigger(ScoreEvent);
            }
        }
    }
}
Finish the Flappy Bird scene with background, polish, and motion
A scrolling parallax background is created with a custom material and WGSL shader, added via a plugin and mesh. Hide score gap and turn off gizmo visuals for the release build. Use sine wave functions to offset pipes vertically and rotate the bird to match its movement direction.
- The bird sprite is tinted for visibility and rotates based on its velocity.
- Background uses a mesh and custom material/shader for scrolling.
- Pipes spawn at varying heights driven by a sine function.
- Collision and score are fully enabled. Gizmo visuals and debug elements are hidden for the final release.
Also worth knowing
- Match your Bevy version lockfile: If debug rectangle offsets appear wrong, copy the lockfile from the finished example to fix misalignment due to engine changes.
- Create the background WGSL file manually: The shader file for the scrolling background isn’t auto-generated and needs to be placed in the assets folder.
- Bevy CLI helps with scaffolding and running: Using the CLI is recommended for rapid project setup and easier web deployment.
- ECS structure and events matter: The workshop’s explanation of required components and event handling is especially useful if upgrading across Bevy versions.
FAQ
Bevy Flappy Bird workshop
You can use the prepared starter project or scaffold a new one. The project structure uses Bevy’s ECS: entities hold data, systems handle game logic, and components define behavior.
how to make a Flappy Bird game in Bevy
Start with a camera and a player bird that falls due to gravity and jumps with input. Add pipe obstacles using a plugin, implement collision and scoring, and finish by adding background and polish.
Bevy beginner game tutorial
This guide uses simple entities for game objects, with components to store data and systems to manage movement, collision, and scoring.
Bevy ECS game structure tutorial
Bevy's ECS structure organizes the game around entities (the bird, pipes), components (gravity, velocity), and systems (movement, respawn, collision). Plugins encapsulate distinct features like pipes.
Rust game engine tutorial with Bevy
Your game starts in main, with app setup separated into plugins and systems. Gameplay logic and rendering are organized through ECS scheduling for clear and maintainable game structure.
Official reference: The Rust Programming Language.
Sources
Screenshots on this page are frames from the videos below, used to illustrate the steps they describe. All rights remain with their creators.
- Full Bevy 0.18 Flappy Bird Workshop — chris biscardi, January 21, 2026
Checked against:
- Bevy News — bevyengine.org