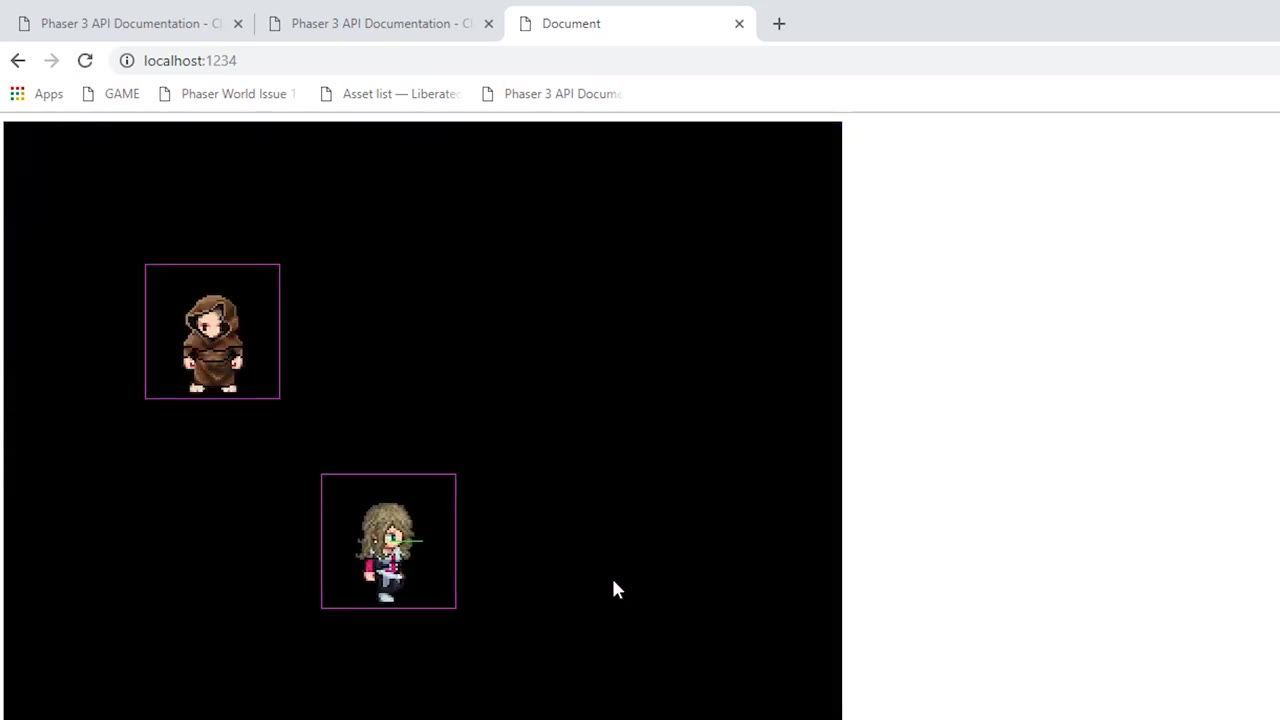
To set up basic physics-driven movement and collision in Phaser, enable Arcade Physics in your config, create the player as a physics sprite, and handle keyboard input in the scene update loop to set velocity instead of directly changing position. Add colliders or overlap callbacks for interactions, and use velocity to determine and switch the player's animation state so things stay in sync.
Set up Arcade Physics for player movement
Arcade Physics is a lightweight choice in Phaser for fast, simple collisions with rectangles or circles. To enable it, add a physics configuration to your main game config and set Arcade as the default, so all physics-enabled sprites use it. Enabling debug mode shows outlines for physics bodies during development.

A TypeScript config file is open with Phaser physics settings visible, including default arcade and debug true. — jest array
prerequisites
- Phaser installed and runnable in your project.
- Your main game config open and ready to edit.
- At least one scene for player movement (like
PlayScene).
Set Arcade as the default physics system and turn on debug in your config. This helps you see and adjust how collision bodies are placed.
const config = {
  type: Phaser.AUTO,
  width: 800,
  height: 600,
  scene: [PlayScene],
  physics: {
    default: 'arcade',
    arcade: {
      debug: true  // Set true for visible body outlines
    }
  }
};

const game = new Phaser.Game(config);
Add a physics-enabled player sprite
Create a player sprite using the physics system so it interacts with collisions and velocity. This assigns a physics body automatically.

A code editor shows PlayScene.ts with code creating physics-enabled sprites in the create function. — jest array
Add your player in the scene's create method, using the physics add path:
// In your scene's create function
this.player = this.physics.add.sprite(100, 100, 'anna');

// If using an existing sprite, you can add physics like this:
// this.physics.add.existing(existingSprite);
This makes your sprite respond to physics, velocity, gravity, and collisions.
Read keyboard input in the scene update loop
Preview and wire keyboard controls to move the player. Listen for keys and handle movement in the update loop.

A code editor shows PlayScene.ts with scene setup code and an incomplete keyboard input line with autocomplete suggestions open. — jest array
Declare a keyboard property on your scene and set it up:
// In create:
this.keyboard = this.input.keyboard.addKeys('W,S,A,D');
Then, in your update function, read key state and move the player. You can initially nudge position directly:
update(time, delta) {
  if (this.keyboard.A.isDown) {
    this.player.x -= 2;
    this.player.anims.play('left', true);
  } else if (this.keyboard.D.isDown) {
    this.player.x += 2;
    this.player.anims.play('right', true);
  }

  if (this.keyboard.W.isDown) {
    this.player.y -= 2;
    this.player.anims.play('up', true);
  } else if (this.keyboard.S.isDown) {
    this.player.y += 2;
    this.player.anims.play('down', true);
  }
}
Use velocity instead of direct position changes
Directly changing the sprite's position does not interact with physics or collisions. Switch to setting velocity on the physics body for proper movement and collision handling.

A TypeScript file is open in a code editor, showing movement logic with a velocity call and direct position change. — jest array
before after
Direct position change
if (this.keyboard.D.isDown) {
  this.player.x += 2;
}Physics velocity control
// Set initial velocity to zero so no sliding when keys aren't pressed
this.player.body.setVelocity(0);

if (this.keyboard.A.isDown) {
  this.player.body.setVelocityX(-128);
}
if (this.keyboard.D.isDown) {
  this.player.body.setVelocityX(128);
}
if (this.keyboard.W.isDown) {
  this.player.body.setVelocityY(-128);
}
if (this.keyboard.S.isDown) {
  this.player.body.setVelocityY(128);
}

// Choose animation by velocity (not key press)
if (this.player.body.velocity.x > 0) {
  this.player.anims.play('right', true);
} else if (this.player.body.velocity.x < 0) {
  this.player.anims.play('left', true);
} else if (this.player.body.velocity.y < 0) {
  this.player.anims.play('up', true);
} else if (this.player.body.velocity.y > 0) {
  this.player.anims.play('down', true);
} else {
  this.player.anims.stop();
}
With velocity, the player sprite responds to collisions, physics, and stops moving when no key is pressed.
Add collisions, callbacks, and overlap behavior
Arcade Physics supports several ways to handle collisions and overlaps. Choose the function that fits how your objects should interact.

A TypeScript scene is open in a code editor with this.physics.world.collide called in the update method and an autocomplete panel over the code. — jest array
steps
To block movement between two objects (player and enemy, for example), use:
javascriptthis.physics.world.collide(this.player, this.enemy);To run collision logic on contact (like destroying both objects):
javascriptthis.physics.world.collide( this.player, this.enemy, (player, enemy) => { player.destroy(); enemy.destroy(); } );To automatically handle collision every frame between two game objects or groups, use
addCollider:javascriptthis.physics.add.collider(this.player, this.enemy);For steering one object toward another with Arcade Physics:
javascriptthis.physics.accelerateToObject(this.enemy, this.player, 200);
Use colliders for blocking contact, overlap for events (like pickups), and callbacks wherever you want to handle a reaction when two bodies touch.
Handle hitboxes, movement bounds, and animation state

A code editor displays Phaser scene code with a setSize call and a tooltip describing the sprite size. — jest array
Also worth knowing
- Type checking scene globals: If you are using TypeScript and store scene globals like
keyboard, you may need to add a global interface declaration forWindowor the scene to avoid type errors. - TypeScript/JavaScript signature mismatch: If your
updatemethod uses a TypeScript signature with bothtimeanddelta, but your project is in plain JavaScript, you might need to adjust the signature so Phaser finds and calls yourupdatefunction correctly. - Input initialization order: Referencing keyboard input before it is set up in the scene can cause the game to show a black screen due to scene errors. Initialize all input before using it in
update().
FAQ
how to add collisions in Phaser
Enable Arcade Physics in your game config, create objects as physics-enabled sprites, and use colliders or the collide method to block movement or trigger an overlap callback when objects touch.
Phaser arcade physics tutorial
Arcade Physics in Phaser provides an easy way to create simple 2D physics with velocity and rectangular or circular collision bodies. Set it as the default physics system in your configuration, create physics sprites, and use the built-in methods for movement and contacts.
Phaser player movement with keyboard
Attach keyboard input in your scene, then check key state each frame in the update loop. Set velocity on the player sprite's body in response to key presses for smooth, physics-based movement.
Phaser tilemap collision guide
Use physics colliders between your player and the solid tilemap layers. Add a collider in your scene to block movement when the physics body touches blocked tiles.
Phaser gravity and jumping
Physics bodies in Arcade Physics can use gravity, and jumping works by setting the vertical velocity if the player is on the ground. The player body will react to gravity, allowing for platforming movement.
Phaser top-down movement tutorial
For top-down movement, set velocity on both X and Y axes in response to input, and use velocity to pick the animation for the player's facing direction. Tie movement and animation together so that diagonal movement looks and feels right.
Official reference: Phaser on GitHub.
Sources
Screenshots on this page are frames from the videos below, used to illustrate the steps they describe. All rights remain with their creators.
- Phaser 3 Game Tutorial 07 Basic Physics and Input — jest array, November 21, 2018
Checked against:
- Phaser Speedrun and Customization Update — refractiongames2020, 2020-09-18