Open Roblox Studio, start a new Baseplate place, and when your place is ready, publish it to Roblox and set your game's name, creator, and device settings.
Open Roblox Studio and start a new place
steps
- Search for Roblox Studio on your computer, or download it from the Roblox create page if you do not have it installed.
- On the Studio start screen, go to the New section and select the normal Baseplate template.
- Wait for the project to load. You will start with a blank, flat baseplate in a new place, ready for editing.
Learn the Studio layout you will use first
prerequisites
- The top bar shows important tabs: File, Home, Model, View, Test, Avatar, and Plugins.
- The View tab lets you show or hide panels like Explorer, Toolbox, and Properties.

Roblox Studio shows the top bar tabs, side panels, and the main workspace with a baseplate. — SmartyRBX
Use Explorer and Workspace to understand what is in the place
steps
- Find the Explorer panel to see a list of services and objects in your place.
- Look under Workspace in Explorer to find objects in your scene.
- Select and delete an object to see it removed from both the viewport and Explorer. Use Undo (Ctrl+Z) to restore anything you accidentally remove.

Roblox Studio displays a gray workspace scene with a long white part and the Output panel docked below. — SmartyRBX
Build with parts, move tools, and snap settings
steps
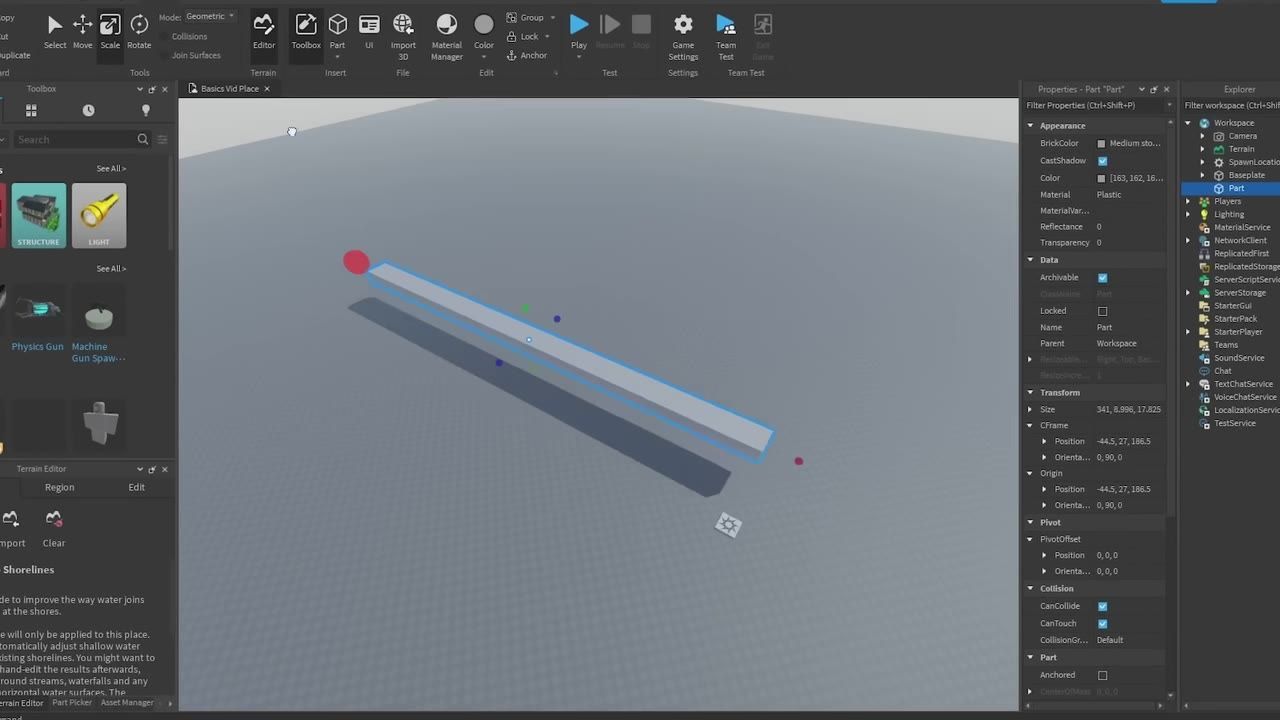
- Click the Part button in the toolbar to add a block, sphere, wedge, or cylinder to your scene. Most new builds start with a block.
- Use the Move, Scale, and Rotate tools to position and size each part. The move tool lets you drag parts on the X, Y, and Z axes.
- Adjust snap to grid and increment settings using the Model tab for more precise placement. Smaller increments like 0.1, 0.25, or 0.5 let you move parts more finely; rotation increments can be set to 15 for smoother turns.
- Switch between Local and World space for moving and rotating parts. Local aligns the tool to the part’s orientation.

Roblox Studio shows a selected part on the baseplate with the Model editing tools available. — SmartyRBX
Shape a simple playable building with walls, roof, and openings
before after
Plain Blocks
- Place and scale basic blocks to form the walls and roof.
- Use duplicate (Ctrl+D) to create matching walls quickly.
- Avoid overlapping parts to prevent visual glitches (Z-fighting).
- Use aligned reference blocks to cut in windows or doors by resizing and duplicating.
Improved Structure
- Insert wedges for sloped roofs and adjust their size and orientation.
- Use local/world space options for cleaner alignment of complex parts.
- Employ plugins for finer alignment and resizing if parts will not line up well by hand.
- Make windows by resizing interior cutouts and adjusting transparency and materials in Properties; experiment with color, reflectance, and smooth plastic.

Roblox Studio displays a simple block building under construction with a selected wall part and the Properties panel open. — SmartyRBX
Publish the place and turn on useful extras
Once you have built a playable place, save and publish it to Roblox so it is accessible online. Use extra Studio features to help your workflow:
- Publish to Roblox lets you set the name, creator, genre, and which devices can play your game. Creating a game in your user or a group is possible here.
- Team Create allows multiple users to build together in one project in real time.
- Customize Shortcuts in the Advanced file options to set custom keybinds for tools or plugins you use often.
- Beta Features gives access to early tools and improvements. You may need to restart Studio to see new features take effect.

Roblox Studio displays the Publish Game dialog with Basic Info options and device checkboxes visible. — SmartyRBX
When you finish your place, publish it to Roblox and configure settings as needed. Turning on Team Create and customizing your shortcuts can save time as projects grow. Exploring beta features can improve your toolset, but you may need to restart Studio for changes to appear.
Also worth knowing
- Finer movement: Use small move increments like 0.1, 0.25, or 0.5 for detailed part placement instead of whole studs.
- Building plugins: Plugins for aligning and resizing parts can help with tricky edges, windows, or roofs, where manual scaling is difficult.
- Shortcuts panel: Setting custom shortcuts speeds up frequent actions; assign keys to the tools or plugins you rely on most.
- Beta features refresh: After enabling new beta tools, you may need to close and reopen Studio before they appear in the ribbon.
- Avoid Z-fighting: Leaving a small gap between parts or careful alignment helps prevent shimmering or flickering effects when parts overlap.
- Terrain workflow: Converting parts into terrain with a plugin and painting them later can make terrain layout and texturing easier.
FAQ
how to start in Roblox Studio
Download Roblox Studio from the create page or search for it on your computer, then launch it. You can begin right away from the New section by creating a Baseplate place.
Roblox Studio first game tutorial
Start a new Baseplate, use the toolbar to add blocks or other parts, arrange them with move and scale tools, add a spawn location, then publish your game to Roblox to make it playable.
Roblox Studio setup guide
To set up Roblox Studio, make sure the essential panels like Explorer and Properties are visible via the View tab. Adjust your editing workspace, snap settings, and familiarize yourself with the top bar and tool panels.
Roblox Studio make a playable place
Create a Baseplate, add parts to form a simple structure, include a spawn location, and ensure everything is positioned in Workspace. When your build is ready, use Publish to Roblox to create a playable place online.
Roblox Studio workspace basics
The Workspace contains all visible parts of your game scene. Use the Explorer panel to organize and select objects in Workspace. Deleting objects removes them from the scene and the Explorer, and Undo can restore them.
Roblox Studio beginner tutorial
Begin by opening Roblox Studio, starting a Baseplate, learning the building tools and key panels, building basic shapes, and publishing your finished place to Roblox. Small, regular practice builds skill.
Official reference: Roblox Creator documentation.
Sources
Screenshots on this page are frames from the videos below, used to illustrate the steps they describe. All rights remain with their creators.
- The ULTIMATE Beginner Guide to Roblox Studio.. (Start BUILDING Now!) — SmartyRBX, May 10, 2023
Checked against:
- https://create.roblox.com/docs/release-notes — create.roblox.com