For smooth and jitter-free FPS controls in Unity, use a Cinemachine first-person camera for mouse look and handle player movement with a rigidbody controller. Moving the player happens in FixedUpdate, while mouse look is kept on the camera, avoiding update mismatches that cause jitter. If your camera feels sluggish or stuttery, switch to this Cinemachine setup for consistent results.
What you need before you start
- Unity with a 3D scene set up.
- A player character with a rigidbody component.
- A player controller script that uses the new Unity input system for movement.
- A camera that is initially set as a child of the player (for the old setup, about to be replaced).

Unity Editor displays a simple outdoor scene in the Scene view with a player character, a cube, and terrain. — semikoder
Build the player controller movement
Implement player movement using rigidbody physics and the new Unity Input System. This keeps movement smooth and physics-consistent.
steps
- Select your player character in the Hierarchy.
- Add a Rigidbody component if there isn't one.
- Attach your player input script (using the Unity input system).
- Update your movement script to move the rigidbody in FixedUpdate, using forces rather than modifying velocity directly.
using UnityEngine;
using UnityEngine.InputSystem;

public class PlayerController : MonoBehaviour
{
    public float moveForce = 10f;
    private Rigidbody rb;
    private Vector2 moveInput;

    void Awake()
    {
        rb = GetComponent<Rigidbody>();
    }

    public void OnMove(InputAction.CallbackContext context)
    {
        moveInput = context.ReadValue<Vector2>();
    }

    void FixedUpdate()
    {
        Vector3 move = new Vector3(moveInput.x, 0, moveInput.y);
        rb.AddForce(move * moveForce);
    }
}
The Unity Editor shows the player object selected with Rigidbody, Player Input, and Player Controller script settings visible. — semikoder
Replace the child camera with a Cinemachine first-person camera
Swap your old camera setup for a Cinemachine camera that follows the player's head, eliminating jitter from mismatched update rates.
steps
- Remove the old main camera if it is a child of the player and has a custom script overriding its movement.
- Create a new Cinemachine camera for first-person view.
- Create an empty GameObject (“Head” or similar) at the player's head position.
- Set this object as the camera’s tracking target in the Cinemachine camera settings.
- Set position control to Hard Lock to Target.
- Set rotation control to Pan Tilt.

The Unity editor is open with the Cinemachine creation menu expanded over the scene view. — semikoder
Wire mouse look through the input controller
Set up mouse movement for looking around, ensuring no input smoothing slows down camera response.
steps
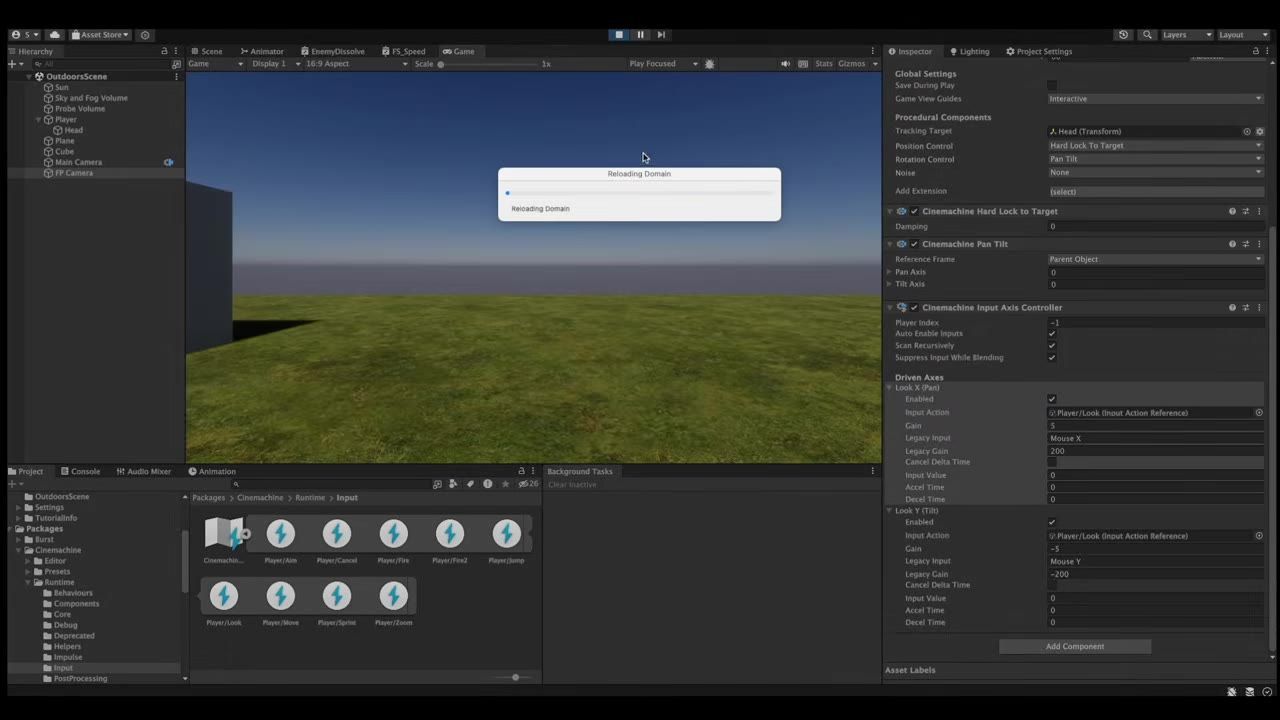
- Click Add Input Controller on the Cinemachine first-person camera’s Pan Tilt section.
- Set Look Axis Acceleration Time to zero.
- Set Look Axis Deceleration Time to zero.
- This avoids sluggish or delayed camera movement during fast mouse movements.

The Unity Inspector shows a Cinemachine Camera with an Add Input Controller control visible. — semikoder
Fix camera jitter by keeping movement and rotation in the right place
Keep physics-driven movement in FixedUpdate and camera rotation (with Cinemachine) on the rendering update path. The old way, where both were mixed, was the cause of jitter.
before after
Old Setup (Jittery):
- Player moved with rigidbody physics in FixedUpdate.
- Camera followed as a child, but mouse look was handled in Update or through a script attached to the camera.
- Result: movement and camera rotation happened on different ticks, causing a jitter effect, especially when moving and turning at the same time.
Correct Setup (Jitter-Free):
- Rigidbody movement still occurs in FixedUpdate.
- Camera rotation and mouse look handled by Cinemachine with input on the update path.
- No camera code in FixedUpdate, reducing sync issues.
- Camera and player movement are now smoothly matched, eliminating visual jitter.
Add simple noise and camera shake
Add subtle camera sway and feedback effects using Cinemachine’s built-in noise and impulse components.
steps
- On the Cinemachine camera, select the Basic Multi-Channel Perlin noise option.
- Choose a noise preset profile from the dropdown.
- Lower amplitude gain and frequency gain for a subtle effect (example: amplitude 0.2, frequency 0.3).
- Add a Cinemachine Impulse Listener to your first-person camera.
- Create a new empty GameObject and add a Cinemachine Impulse Source component to it.
- Triggering this impulse source will create camera shake for events like explosions.

Unity Editor shows the FP Camera Inspector with Cinemachine noise settings visible alongside the scene view. — semikoder

Unity Editor shows the Impulse Source object selected while the Inspector searches for the Cinemachine Impulse Source component. — semikoder
When to use Cinemachine for a first-person controller
Cinemachine 3 is recommended for FPS controls, as it addresses mouse movement issues that depend on the frame rate. With Cinemachine, movement, camera, and mouse look are handled independently and cleanly. This approach is also ready for use with cutscenes and more advanced camera features later.
Also worth knowing
- Cinemachine 3 is required for proper mouse movement. Earlier versions did not fully fix frame-rate-dependent mouse input issues.
- Set look axis acceleration and deceleration to zero to avoid any lingering lag or sluggishness in the camera’s mouse movement.
- Remove any script that rotates the player body toward the camera every frame as this can reintroduce the lag or jitter you are trying to avoid.
FAQ
Unity first person camera tutorial
Cinemachine streamlines first-person camera setup in Unity. Create a Cinemachine camera, attach it to track a head object on the player, and let Cinemachine handle smooth, jitter-free tracking and rotation.
how to make movement in Unity
Use a rigidbody-based player controller. Read player input and apply movement forces in FixedUpdate, which matches Unity's physics timing for reliable, smooth physics-driven movement.
Unity mouse look controller
After setting up a Cinemachine camera, add an input controller, link the mouse axes, and ensure smoothing times are zero for fast, responsive camera movement.
beginner FPS controller Unity
Start with a rigidbody-driven player and use Cinemachine for the camera. Separate movement (FixedUpdate) from mouse look (Cinemachine) for simple, clean, and robust FPS controls.
Unity camera and movement setup
Combine a rigidbody player (movement in FixedUpdate) with a Cinemachine first-person camera (mouse look through input controller) for stable, jitter-free controls. Keep these responsibilities separated to avoid sync problems and visual jitter.
Official reference: Unity manual.
Sources
Screenshots on this page are frames from the videos below, used to illustrate the steps they describe. All rights remain with their creators.
- How to make The Best First Person Camera in Unity — semikoder, May 1, 2024
Checked against:
- Download Archive — Unity