Build the in-game PC as its own scene, render the UI onto its screen using a SubViewport, and swap player control between the world and the computer with an input lock. Forward mouse and keyboard events into the SubViewport so all screen UI—including buttons, text fields, and even drag-and-drop—behaves interactively.
What you are building
You are building a 3D first-person environment where the player can walk up to a computer, activate it, and interact with a fully functional UI in the PC's screen. While using the computer, keyboard and mouse input go directly to the PC's Control-based UI. Hitting Escape returns control to the player, resuming world movement. The result feels like using an embedded virtual PC in the game world.
Set up the player, floor, and input actions
- Create a main 3D scene and add a floor using a 3D shape (such as a CSG box) with collision enabled so the player will not fall through.
- Add sun and environment nodes to ensure the scene is properly lit.
- Add a CharacterBody3D node and name it player.
- Attach a CollisionShape3D (capsule shape is common) to the player and set its size so it matches a humanoid height.
- Add a Camera3D as a child of the player, positioned at head height.
- Set up the input actions in the input map for move up, down, left, right, and interact. Assign keys or mouse buttons as needed.
- Apply a movement script to the player, handling mouse look, WASD movement (or similar), and setting mouse mode to captured so the cursor does not appear by default.

The Godot 3D workspace is open with the scene tree visible and the Create New Node dialog centered over the viewport. — Rembot Games
Turn the computer into its own interactive scene
- Import or create a computer model (old-style or otherwise) and set its scale so it fits naturally in the environment (for example, on a desk).
- Move the mesh into a new scene. Name it PC scene.
- Make the root node a StaticBody3D and attach a CollisionShape3D sized to cover the usable area, not just the visible mesh.
- Set the collision layer and mask to an interactive layer so that only shape casts or rays meant for interactable objects will detect it. The player should not collide with or be blocked by the PC.

The Godot editor shows a scene tree and a small computer model in the 3D viewport. — Rembot Games
Build the screen UI with a SubViewport and Control node
- Add a MeshInstance3D (the screen) as a child of the PC scene.
- Create a SubViewport node and set its resolution (such as 640×480 or 800×600) so the UI does not stretch.
- Assign a ViewportTexture to the screen mesh material, linking it to the SubViewport so whatever is rendered in the SubViewport appears on the mesh.
- Inside the SubViewport, add a Control node and design the interface (background, windows, buttons, text fields).
- Assemble all PC UI inside the Control node or in a separate scene instance for ease of editing and reusability.

The Godot editor displays a PCScene with a SubViewport and Control node selected in the scene tree. — Rembot Games
Use a shape cast to detect the computer in front of the player
- Attach a ShapeCast3D (small sphere shape) to the player's camera, facing forward.
- Set the shape cast to collide with bodies and set the collision mask to the interactive layer.
- Each frame (or on input), test if the shape cast collides with a PC scene in front of the player. Get the first collision result and check if the collider is the PC scene node.
- Trigger PC activation code when the interact input is pressed while the PC is detected under the crosshair.

Godot Engine displays a 3D scene with collision shapes and a red ShapeCast3D indicator in the viewport. — Rembot Games
Lock the player and hand control to the PC scene
When the interact button is used on the computer, the player's world controls must be disabled, and input redirected to the PC:
Before:
# Player.gd
var input_locked = false

func _physics_process(delta):
    if input_locked:
        return
    # ...movement code...
After:
# Player.gd
var input_locked = false

func _physics_process(delta):
    if input_locked:
        velocity.x = 0
        velocity.z = 0
        return
    # ...movement code...

# PC Scene script
var is_using = false
var player = null

func _ready():
    player = get_tree().get_first_node_in_group("player")

func toggle_use():
    is_using = !is_using
    $Camera3D.current = is_using
    if is_using:
        player.input_locked = true
    else:
        player.input_locked = false

func _input(event):
    if is_using and event.is_action_pressed("ui_cancel"):
        toggle_use()
The Godot editor shows the PC scene tree and its script open for editing. — Rembot Games
Forward mouse, keyboard, and drag input into the UI
- Add a visible mouse cursor to the Control UI (such as a Sprite2D or TextureRect at the top of the scene tree so it stays above all elements).
- Forward mouse motion, click, and key events to the SubViewport using code. This ensures clicks, typing, and control shortcuts are captured by the screen.
- When forwarding, handle standard events such as buttons and LineEdits so that all interactive UI widgets behave as expected. Drag-and-drop support can be added by pushing relevant motion and drag events.
- Avoid built-in embedded sub-windows for Control-based windows, as layering and cursor display can break in those contexts. Instead, build custom windows and panels for any draggable UI inside the PC.

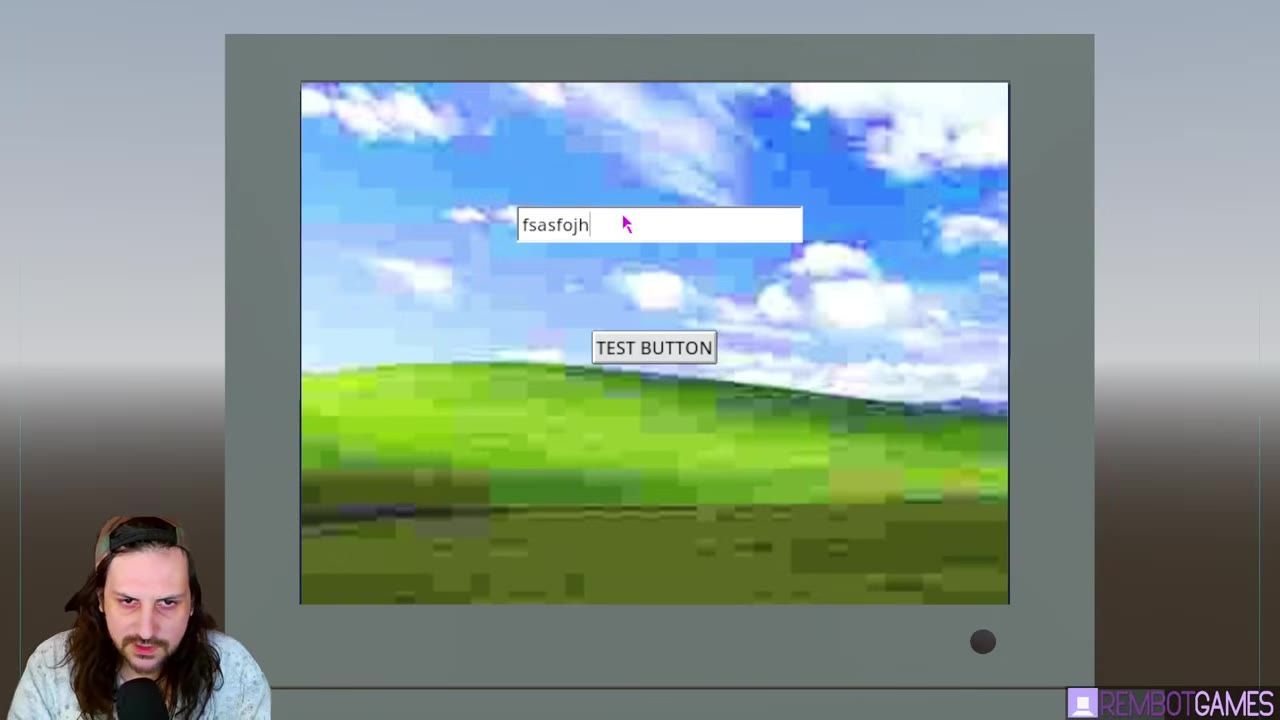
An embedded computer screen is shown inside the game with the cursor visible over the UI. — Rembot Games
Example input forwarding (PC scene logic):
# Inside PCScene.gd

@onready var sub_viewport = $SubViewport
@onready var pc_control  = $SubViewport/PCControl

func _input(event):
    if is_using:
        # Forward all input except escape (which exits PC use)
        if event.is_action_pressed("ui_cancel"):
            toggle_use()
            return
        sub_viewport.push_input(event)
        # For mouse motion, update the in-game cursor
        if event is InputEventMouseMotion:
            pc_control.update_cursor_pos(event)
Also worth knowing
- Mouse Input Forwarding: If mouse movement does not affect the virtual PC, verify your input forwarding calls are correct and the subviewport is receiving events.
- Cursor Setup Problems: Setting an incorrect mouse mode or missing the cursor setup can cause the cursor to disappear when playtesting.
- Mouse Button Event Relay: Clicks that do not trigger UI elements often point to a missing push of the mouse button event into the SubViewport.
- Null PC Reference: An invalid assignment error can happen if the code tries to set the PC's locked state when the stored player reference is null; check that the PC scene finds and stores the player node at runtime.
- Static Body Name Mismatch: If interaction fails, ensure the PC scene's static body node name or class matches what your detection and toggling code expects.
FAQ
how to make an in-game computer in Godot 4
Build the computer as its own scene, render a Control-based UI into a SubViewport assigned to a screen mesh, detect and lock player input when interacting, and forward all input events into the UI so you can type and click as on a real PC.
Godot 4 interactive UI tutorial
The main steps are using Control nodes inside a SubViewport, displaying them via a ViewportTexture on a 3D mesh, and forwarding mouse and keyboard events so UI buttons and fields behave interactively.
build an accessible game menu system in Godot 4
Create your menus in a dedicated Control scene, rendered through a SubViewport. This keeps the menu system easily configurable, themable, and testable outside the game environment.
Godot 4 screen-recorded UI workflow
Separate the 2D Control UI from the 3D shell using the SubViewport system. This allows you to adjust UI resolution and mouse interaction independently of the physical screen mesh in the 3D world.
how to connect UI buttons to game logic in Godot
Connect button and input signals to functions inside the Control or PC scene, letting the PC scene own the computer's state and route commands or keystrokes to the necessary logic or gameplay effects.
Official reference: Godot documentation.
Sources
Screenshots on this page are frames from the videos below, used to illustrate the steps they describe. All rights remain with their creators.
- Build a Functional In-Game PC | Godot 4 Tutorial — Rembot Games, October 18, 2025
Checked against:
- Godot Engine - Blog – Godot Engine — Godot Engine