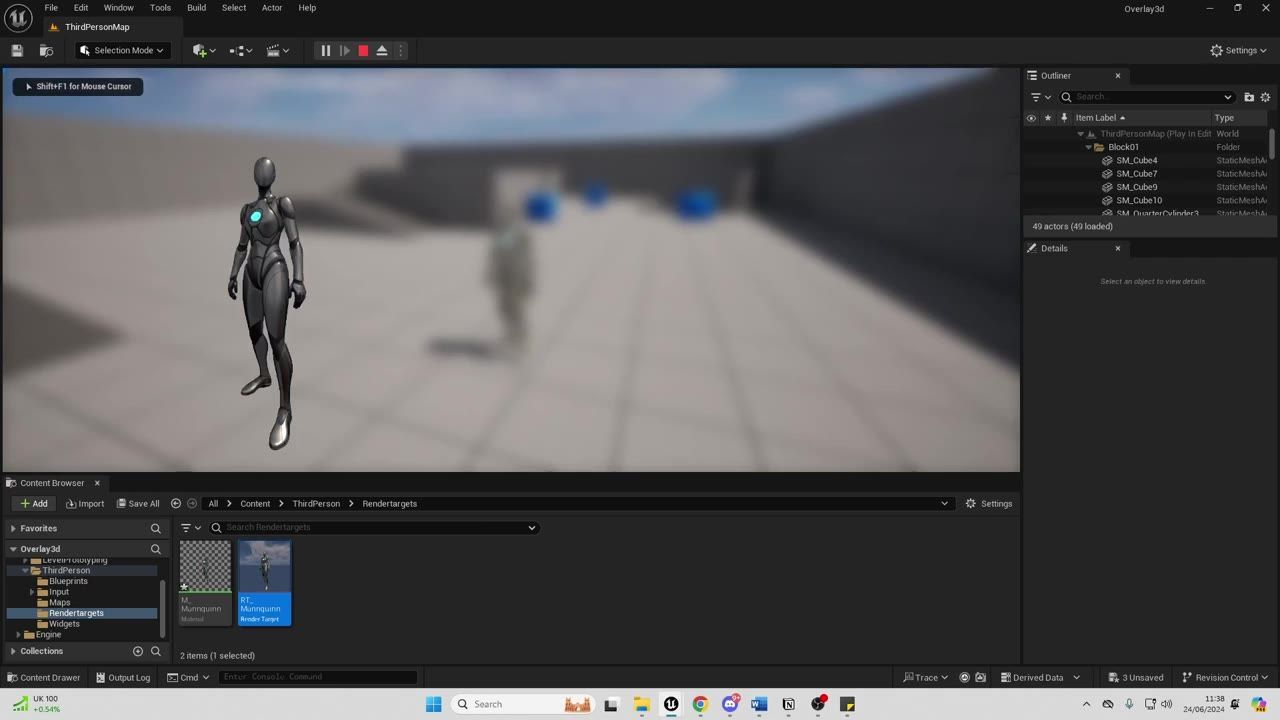
To create a live 3D item preview inside your inventory UI in Unreal Engine 5, build a widget with an Image using a render target, drive it with a SceneCaptureComponent2D set to only show the target mesh, and apply a UI material with the Translucent blend mode to eliminate the black background.
Set up the inventory preview widget
steps
- In the Unreal Engine content browser, create a folder named Widgets.
- Right-click inside this folder and choose User Interface → Widget Blueprint. Select User Widget as the parent class.

The Unreal Engine editor displays the New Widget Blueprint parent class dialog with User Widget selected. — Unreal University
- Name your widget blueprint, for example WidgetBlueprint_3DOverlay, and double-click to open it.
- Drag a Canvas Panel from the Palette onto the designer canvas.
- Add a Background Blur inside your Canvas Panel.

The widget designer is open with a Canvas Panel containing a Background Blur. — Unreal University
- Select the Background Blur, set its anchors to the bottom-right preset, and set Offset values to zero on all sides to stretch it across the canvas.
- Increase the Blur Strength property (e.g., 10) to soften the background under the preview.
Add the preview widget to the player blueprint
steps
- Open your character blueprint and locate the Begin Play event.
- Create your overlay widget on Begin Play using the Create Widget node, then store it in a variable (e.g., 3DWidget).

The character blueprint Event Graph shows a Create Widget node wired into a variable set for the preview widget. — Unreal University
- Add logic for the I key input: when pressed, check if the widget is visible.
- If visible, Remove from Parent.
- Compile the blueprint. Test in play mode: pressing I should open the blurry overlay, pressing again should close it.
Capture the character or item into a render target
steps
- In your character or preview actor, add a SceneCaptureComponent2D.

Unreal Engine blueprint editor shows a character in the viewport with Scene Capture Component 2D selected in the Components panel. — Unreal University
- Create a new folder named RenderTargets. Inside it, right-click → Texture → Render Target.
- Open the Render Target asset and set its resolution to 1024 by 1024.

Unreal Engine displays a Render Target asset info panel with the resolution visible. — Unreal University
- Assign the Render Target to the SceneCaptureComponent2D → Texture Target property.
Show the render target inside the widget
steps
- Return to your preview widget blueprint.
- Add an Image widget to the Canvas Panel.
- Set the Image widget size to 1024 x 1024 for consistency with your render target.
- In the Details panel, set the Brush property of the Image to your Render Target asset.

The Widget Designer shows an Image widget selected with its settings open in the Details panel. — Unreal University
- Use the widget preview to confirm the image (render target) appears in the UI.
Fix the black background in the preview
before after
Before: The preview shows your mesh with a solid black background.
// SceneCaptureComponent2D captures everything and outputs a render target.
// Image widget displays render target directly, background is black.After: Only the intended mesh appears, and the background is translucent.
// SceneCaptureComponent2D uses Show Only Actor Components to capture only your mesh.
// Material applied to render target:
// - Material Domain: User Interface
// - Blend Mode: Translucent
// - Connect OneMinus(Alpha) node to Opacity to clear the background
// - Assign material to the Image widget Brush property
Tune the camera and field of view for the finished item preview
Also worth knowing
- General-purpose preview: The same 3D preview method works for item portraits, message overlays, equipment, merchant, and sell screens, not just inventory panels.
- Runtime mesh swapping: To update the preview for a picked or equipped item, swap the mesh or actor in front of the capture component at runtime.
- Real-time updates: For smooth previews, make sure the item or character is placed where the SceneCaptureComponent2D can see it and update regularly.
- No black background: To avoid a black box behind the mesh, always use a UI material with a translucent blend mode and proper alpha handling.
- In-game model display: You can rotate, scale, or animate the previewed 3D model by modifying its actor or components between captures for interactive widgets.
- Adaptability: With minor changes, this workflow can power multiple UI overlays that need live 3D mesh previews.
FAQ
Unreal Engine 5 inventory UI tutorial
To build an inventory UI with a live 3D item preview, combine UMG widgets, a render target driven by a SceneCaptureComponent2D, and a translucent UI material to embed the preview in your overlay.
how to display 3D meshes in widgets UE5
Use a SceneCaptureComponent2D to render your item or character to a render target, then display that render target in an Image widget using a UI material set to User Interface and Translucent.
UE5 item preview widget tutorial
Set up a widget with an Image tied to a render target, configure the SceneCaptureComponent2D to show only the mesh or actor you want, and apply a translucent UI material to remove the background.
beginner inventory system in Unreal Engine 5
For a basic inventory: use a widget overlay toggled by input, display items in the UI, and show selected items with a 3D preview driven by a render target and capture component.
Unreal Engine 5 UMG inventory guide
Start by making a widget with a blurred background, add item slots and a preview panel, then use a render target and UI material as described above for live mesh previews in the inventory.
Official reference: Unreal Engine documentation.
Sources
Screenshots on this page are frames from the videos below, used to illustrate the steps they describe. All rights remain with their creators.
- How To Display 3D Meshes In Widgets - Unreal Engine 5 Tutorial — Unreal University, June 25, 2024
Checked against: